|
Home Source Code Getting Started Tutorials Mailing List Contributing Acknowledgements FAQ |
Getting Started with FeS2The following directions will walk you through the process of simulating a simple test program, and viewing a simulation trace in TraceVis. In the following commands, replace<FeS2InstallDir> with the full path where you have already installed and compiled FeS2.
Create a Simics Checkpoint Containing the Test ProgramDownload the tango1-fedora5.craff image and use it to boot a tango machine. Once the machine has booted up, type the following commands inside the simulated machine's console.[root@tango ~]# mount /host [root@tango ~]# cp /host/<FeS2InstallDir>/test/example/simpletest/simpletest.c . [root@tango ~]# umount /host [root@tango ~]# gcc -o simpletest simpletest.cAfter compilation has finished, stop Simics and create a checkpoint named tango_booted.
Simulate the Test ProgramA Simics script file, for running thesimpletest binary
inside the checkpoint, and some related files can be found in your
<FeS2InstallDir>/test/example/simpletest
directory. To use them, copy the files into your
FeS2-workspace directory.
> cd <FeS2InstallDir>
> cp test/example/simpletest/* simics/FeS2-workspace
Next, use the script simpletest_notrace.simics to run the example.
> cd simics/FeS2-workspace
> ./simics -quiet tango_booted -x simpletest_notrace.simics
The script uses the magic instructions compiled into the sample program as markers for starting the simulator in warmup, switching to timing mode and finally terminating the simulation. Two statistic files will be generated: one for the warmup named simpletest.stats.warmup, and one for the timing run named simpletest.stats. These statistics files are formatted such that they can be directly parsed by a python script for analysis, as demonstrated by the included example script.
> ./simpletest_stats_parser.py simpletest.stats
--------------------------------------------------------------------------------
infile: simpletest.stats
total cycles: 45602
total UOps: 144481 ( UPC: 3.168 ),
total X86 Ops: 92473 ( IPC: 2.028 ),
error rate: 0.0530% ,
branch prediction: 99.61% ,
--------------------------------------------------------------------------------
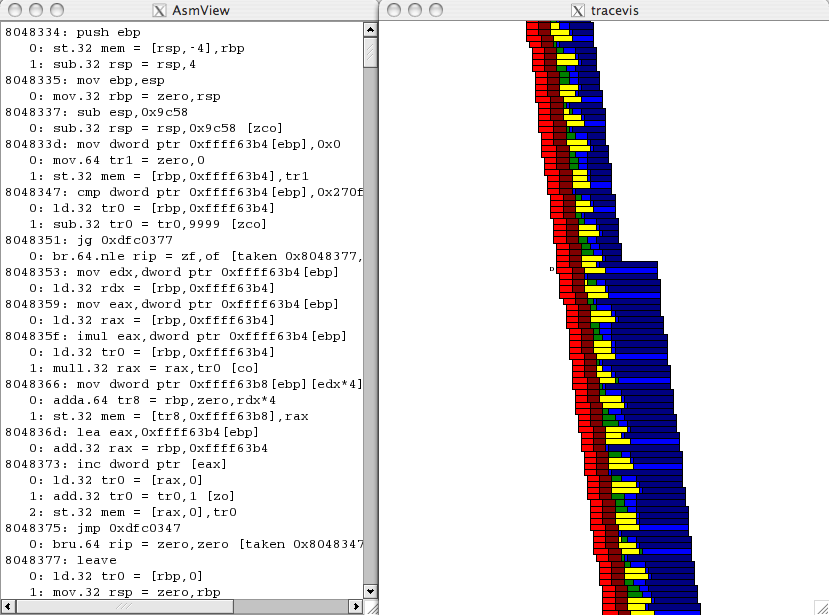
Viewing the Results with TraceVisFirst you must checkout and build TraceVis. Assuming you would like to checkout the source into a directory namedtracevis, you should simply have to do the following. Note that you must have Qt 3.0 or greater installed. If you do not have Qt 3.0, or simply prefer text, you can try using TracePrinter
> svn co http://subversion.cs.uiuc.edu/pub/svn/FeS2/tracevis/trunk tracevis
> cd tracevis
> setenv PATH ${PWD}:${PATH}
> make
To use TraceVis, you must configure FeS2 to generate the necessary trace dump and disassembly files. We have done just that in a provided Simics script file.
> cd <FeS2InstallDir>/simics/FeS2-workspace
> ./simics -quiet tango_booted -x simpletest_trace.simics
This will generate a disassembly file named simpletest.dis and two dump files, one of which is named simpletest.dump. You can load these files into TraceVis with the following command.
> tracevis -s simpletest.dump -asm simpletest.dis

Viewing the Results using TracePrinterFirst you must checkout and build TracePrinter. Assuming you would like to checkout the source into a directory namedtraceprinter, you should simply have to do the following.
> svn co http://subversion.cs.uiuc.edu/pub/svn/FeS2/traceprinter/trunk traceprinter
> cd traceprinter
> setenv PATH ${PWD}:${PATH}
> make
To use TracePrinter, you must configure FeS2 to generate the necessary trace dump and disassembly files. We have done just that in a provided Simics script file.
> cd <FeS2InstallDir>/simics/FeS2-workspace
> ./simics -quiet tango_booted -x simpletest_trace.simics
This will generate two dump files, one of which is named simpletest.dump. You can read dump files into TracePrinter with the following command.
> traceprinter simpletest.dump 0 0x80483a0: 0 R 1F 5D 9Q 9R 9E 10C 11R 1 0x80483a0: 1 1F 5D 9Q 10R 10E 11C 11R (0) 2 0x80483a0: 2 1F 5D 9Q 9R 9E 10C 11R 3 0x80483a0: 3 1F 5D 9Q 9R 9E 10C 11R 4 0x8048334: 0 2F 6D 10Q 10R 11E 12C 12R (2) 5 0x8048334: 1 2F 6D 10Q 10R 10E 11C 12R (2) ....... |